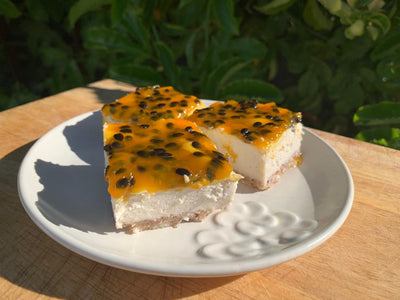
Spiced Butternut Baked Cheesecake

Baked cheesecake remains a firm favourite on any gathering, and this baked Spiced Butternut Cheesecake adds warm flavours that make this cake extra special for autumn and winter.
As one little girl who had a taste of our test cake put it: “I really liked it, and I don’t even like cheese cake, and butternut!” She was keen to get her own slice, after first sharing a slice with her little brother. :) That tells you that the deep creamy texture doesn’t lean to the overly cheesy flavour, or butternut rich taste.
The spice mix is what makes this cake so special, and is easy to put together. We’d recommend you make a batch, as it works well in carrot cake (instead of cinnamon), and gingerbread too!
Spice mix:
- 4 tsp ground cinnamon
- 1 tsp ground cloves
- 1 tsp ground nutmeg
- 1/3 tsp ground ginger
- 1/5 tsp ground white pepper
- 1/5 tsp ground cardamom
- 1/5 tsp ground coriander seeds
- 1/5 tsp ground anise seeds
Cinnamon, cloves, nutmeg, and ginger are essential, and the others can be left out if you don’t have, however obviously changes the flavour slightly.
Crust ingredients:
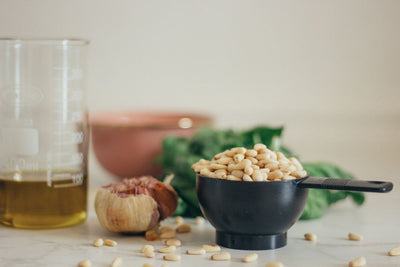
- 1 ½ C Mixed Nuts (almonds, walnut, brazil nuts, cashew all work well, raw and unsalted)
- ½ C Dried Pitted Dates
- 1 Tsp Vanilla essence
Filling ingredients:
- 500 gr Cream Cheese
- 500 gr Butternut, ready prepared, or freshly cut
- 1 C Castor Sugar
- 3 Large Eggs (free range)
- 3 ½ Tsp Spice mix
Directions:
Pre-heat oven at 200C
Roast the butternut without oil until tender, making sure it doesn’t discolour. Remove from the oven, and reduce oven temperature to 190C.
While the butternut is roasting, prepare the cake crust. Soak the dates in hot water for about 10 minutes, and measure the nuts. You can use a mix of nuts. For this cake we used almonds, brazil nuts, and walnuts, but you can use cashew and/or pecan too.
Add the nuts to the OmniBlend jug, and grind on low to medium speed to create a nut meal.
Drain the dates, and pad dry with kitchen towel to remove excess water. Add the dates to the ground nuts, and add the vanilla.
Blend on high, using the tamper to create a dough. The trick is to push the tamper into the corners, pushing the ingredients into the blades. Once the dough has come together, remove it from the jug with a silicon spatula into a cake pan. Create an even layer in the pan, and cover the edges.
Remove the butternut from the oven once soft, and reduce the oven temperature to 190C. Bake the crust for about 10 minutes, until set, and remove from the oven to cool down.
Add the roasted butternut to the OmniBlend jug, and puree using the tamper through the lid.
With a hand mixer, beat the cream cheese for a few minutes. Add the sugar, and mix again. Remove ¼ cup of this mixture and keep aside for decoration later.
Add butternut purée and spices, and mix. Add eggs one at a time, making sure it’s fully incorporated before adding the next.
Transfer the mixture into the cake crust, and spread evenly. Now take the cream cheese & sugar mix that you’ve kept aside, and divide teaspoons full over the batter. Take a skewer, and draw lines through the blobs to create a pattern. You’ll feel like a barista, creating latte art!
Bake the cake for about 40 minutes, keeping a close eye on it toward the end of the baking time, making sure no cracks appear. If they do, reduce the oven temperature as this may vary for every oven.
Remove from the oven (the middle will still look a bit wobbly), and leave to cool to room temperature. Then place in the fridge to further set, for 6 hours (after 4 hours it’ll be set, if you have less patience, just a little bit soft still like in the pictures, so 6 hours or more is better for a fully set result). This cake is also perfect to prep the day before, so that the cake sets properly and the spices fully develop the flavour.
For this recipe we used the OmniBlend I - 2ltr Pro. This model has a turn dial for variable speed control, and a pulse. The 2lt jug works best for grinding dry ingredients, and pureeing with a narrow base.


Leave a comment